The napari hub is transitioning to a community-run implementation due to launch in June 2025.
Since October 1, 2024, this version is no longer actively maintained and will not be updated. New plugins and plugin updates will continue to be listed.

napari 3D filament annotator

napari-filament-annotator

Annotation of filaments / curvilinear structures in 3D

Summary

3D Filament Annotator is a tool for annotating filaments and other curvilinear structures in 3D. The 3D annotation is done by annotating the filament in two different projections, calculating intersection, and refining the filament position with active contours.
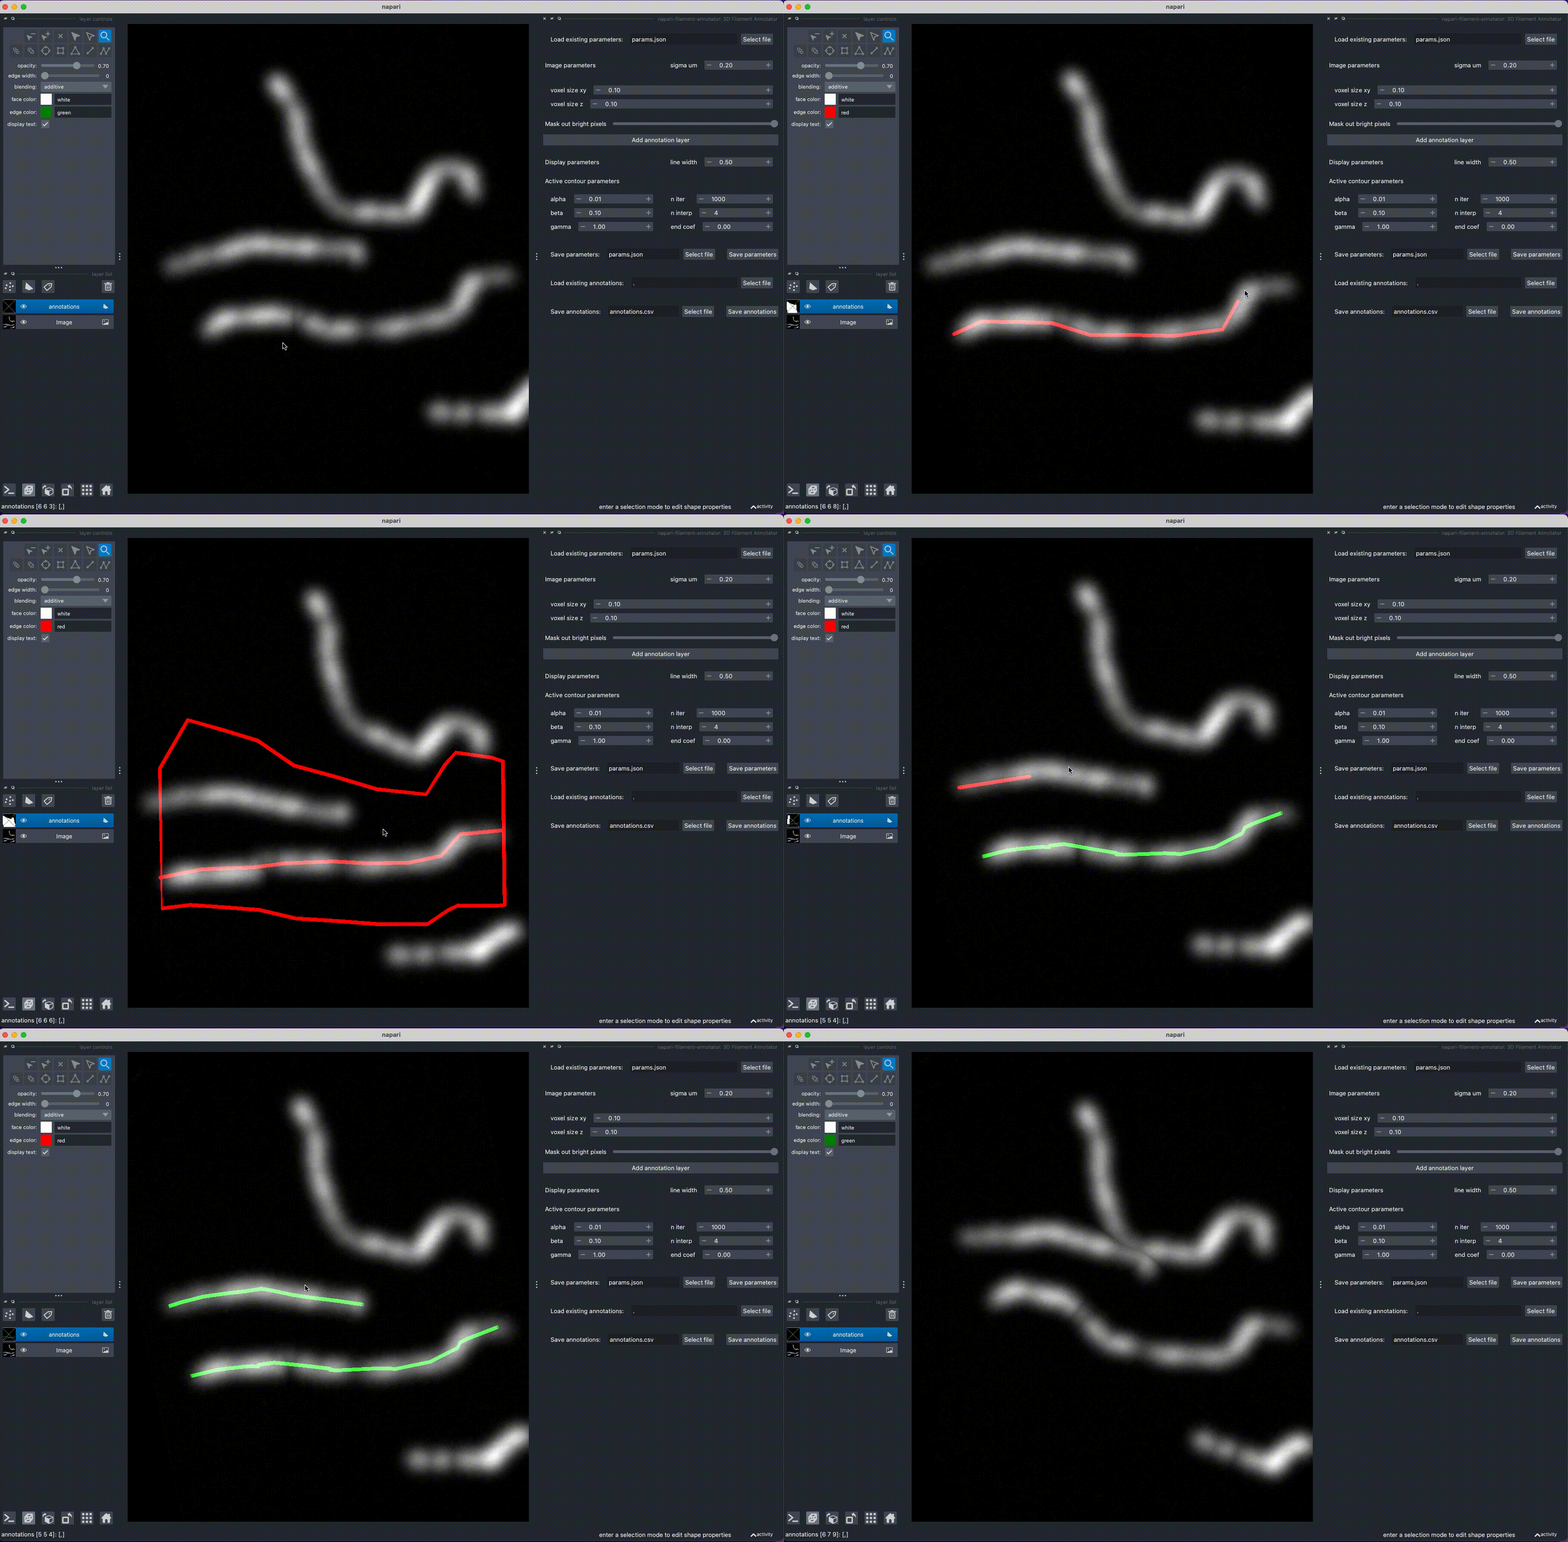
demo

Intended Audience & Supported Data

The plugin is intended for annotation of filamentous structures from a 3D view. The main use-case are structures that are not visible in a single-slice image due to being too thin or too low intensity.

No expertise in image analysis is required to use this plugin, though a basic knowledge of active contours would be helpful to set the parameters.

The plugin expects single-channel 3D images as input. Time-series data are not yet supported.

Quickstart

1. Open example image

Open example image

2. Start the 3D annotator plugin

Start 3D annotator plugin

3. Adjust image parameters

Adjust the voxel size of the image and the Gaussian-smoothing sigma that will be used to smooth the image for active contour refinement of filament position.

  • Voxel size in xy and z
  • Sigma um: smoothing sigma, microns (or the same units as used for the voxel size)

Adjust image parameters

4. Add annotation layer

Click the "Add annotation layer" button to add a new Shapes layer for annotation.

This step might take several seconds, depending on the image size, due to some filtering that is performed behind the scenes.

Add annotation layer

5. Annotate filaments

  1. Rotate the image to find a position, where the filament is clearly visible
  2. Draw a line over the filament, by holding "Control" (or "Command" on macOS) and clicking with the mouse: this will draw a polygon with potential filament locations
  3. Rotate the image to view the filament from another angle and repeat step 2
  4. Rotate the image again: this will calculate the filament position from the intersection of the two polygons
  5. Repeat steps 1-4 for other filaments

Hot keys to edit the annotations:

  • p: delete the last added point (during the polygon drawing)
  • d: delete the last added shape (polygon or filament)
  • f: delete the first point of the last added filament
  • l: delete the last point of the last added filament

Annotate

6. Save annotations

Save final or intermediate annotations to a csv file.

There is an option to load previously annotated filaments and continue the annotation.

Save annotations

Documentation

For more details on the plugin functionality and tips for adjusting parameters, please refer to the Filamenter Annotator Tutorial

Getting Help

If you encounter any problems, please file an issue along with a detailed description.

If you have a question, you can ask it in the Discussion tab of the project.

How to Cite

Anna Medyukhina. (2022). amedyukhina/napari-filament-annotator: Version 0.1 (v0.1). Zenodo. https://doi.org/10.5281/zenodo.7145278

Version:

  • 0.1.2

Last updated:

  • 06 October 2022

First released:

  • 04 October 2022

License:

Supported data:

  • Information not submitted

Plugin type:

GitHub activity:

  • Stars: 12
  • Forks: 2
  • Issues + PRs: 0

Python versions supported:

Operating system:

Requirements:

  • Geometry3D
  • networkx
  • numpy
  • magicgui
  • pandas
  • qtpy
  • scipy
  • sklearn
  • imageio (!=2.22.1)